|
Flat Coloring Tutorial (Photoshop)
This tutorial covers how to color line work in Photoshop the most simplistic way possible. No shading, no fancy effects, just flat areas of tone, painted neatly and in the lines. This is very basic stuff, and if you have any experience with Photoshop coloring at all, this will not blow your mind. My main purpose is to have a foundational tutorial before I begin more advanced coloring tutorials. This lays the essential groundwork.
Scan your line work
You've penciled something, and presumably inked it. Having it inked crisply and neatly will make the coloring that much easier, but this is of course not essential.
Scan big. Even if you never plan on printing out your art, it's much better to work large, and then shrink down your final image. This will diminish the imperfections of the work and make it look more crisp overall. And you're not caught with your pants down should you ever want to print.
If you don't plan to print, I'd recommend scanning at least 200 pixels per inch. If you do want to print, at least 300 ppi.
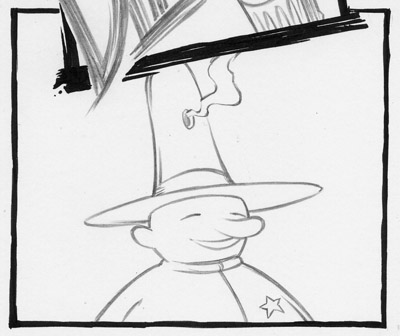
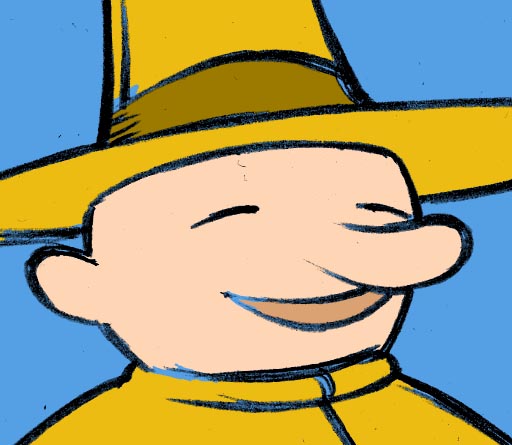
This is the raw scan of the line work. We'll need some more contrast before we can start.
Go to Image -> Adjustments- > Levels. (ctrl+L) Move the leftmost and rightmost arrows closer to the center. This will make the darks darker, and lights lighter. Fiddle with it until you have a nice strong contrast, with few discernable tones besides black and white.
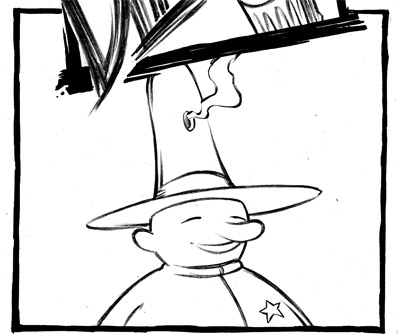
The adjusted image. Now we can start coloring. I've documented 3 different methods for flat coloring. You should read through each successively, as there's a progression of logic moving from one to another.
Method 1 (Impractical and ineffective. Almost useless.)
If you're a beginner, it may be your intuition to reach for the flood fill tool (the paint bucket) and start clicking on areas of the line work that you want to fill. Ok, we'll try it your way.
Oops, look at that. I tried to fill his shirt and it spilled over into his face. On closer inspection, it turns out there are little gaps in my line work. Small enough not to notice, but Photoshop certainly notices. Color will escape through the smallest chink in the line. There are other problems, too.
Zooming in, we notice there are some parts of the line that are grayish, or near-white that don't get filled. You could fight this problem by increasing the “tolerance” property of the paint bucket. But then you'll find the fill color eating into your lines, reducing the subtleties of your nice line work.
You say “Ok, that's a bust. But surely there must be a shortcut to getting all these areas filled.”
Fine, we'll try something a little more promising. This time we'll do the filling on a layer underneath the line work, so it “shows through” the white parts of the layer.
Setting up your layers
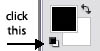
This process is necessary for all methods I describe. First set your background color to white. Easily done by clicking this:
Now you want to configure your layers so they look like this:
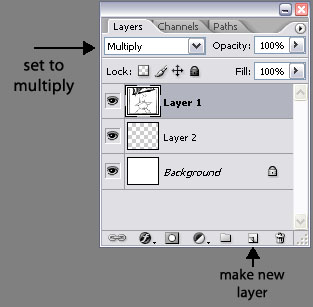
Follow these steps to do this:
- Select the background layer.
- Select All (ctrl+A)
- Cut (ctrl+X)
- Paste (ctrl+V)
- Set to Multiply
- Select background layer
- Make new layer
The new layer in between is where you'll be coloring. All colors will show through the white areas of the line work layer.
First we'll take care of the background color, since it's the easiest one, and all other color layers will rest on top of it. It'll help you make color choices later, knowing what they look like on top of the background color.
Use the rectangular marquee tool to draw a box. Flood fill it with a color.
Once you deselect, you can always recall that selection by ctrl + clicking that layer's icon. This is an important point, particularly for more advanced coloring techniques. When you get into things like shading and textures, a big part of the purpose of doing all this flat coloring (for me at least) is just to have areas of color on separate layers which can be selected and act as masks, for further rendering inside the boundaries of the layer shapes. It saves the headache of having to focus on drawing inside the lines at every step of the way. More on that in another tutorial.
Anyway, we were going to see if there was a really fast way to get this coloring done. We ruled out flood filling the line art directly. But maybe we can get some use out of the magic wand. It is supposed to be magic, after all.
Set the properties of the magic wand to this:

Tolerance doesn't have to be 50 exactly. It's just a generous number without going over the top. It just means how much the created selection will “bleed” into the line comprising the area's perimeter. We're dealing with pretty stark black and white, so this isn't a big issue.
Now with the line work layer selected, click the area you want to color.
Oh yeah, that's right. There are still gaps in the line work, so clicking the shirt floods into the face. This is really starting to be a pain in the ass, isn't it? Here's what we're going to do.
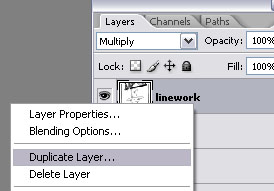
Right-click the linework layer, Duplicate Layer.
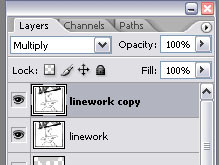
Now we have a copy of the line work to mess with. We're just going to take a brush and fill the gaps in any line we want to fully enclose an area to be colored. And since this is a duplicate layer, we don't have to be too careful about it. We'll just delete it later.


There. Just to show how much trouble this can be, I've highlighted below all the places where I filled gaps.
Maybe you're asking: “So why don't you just draw line art without any gaps? It seems to me a gap in a line should be considered a sloppy mistake anyway.” You're completely wrong. Gaps in lines can be an important part of a drawing style. (As I've Illustrated before) You don't want to sacrifice that just to make coloring easier. And besides, gaps are just going to happen, even if it's not a pivotal part of your style. And the more complex or advanced the line work gets, the more likely they are to occur. Or similar complications will arise, such as with certain kinds of feathering or cross hatching. If that's involved, then just forget this method. (you should probably forget it anyway. I'm only describing it to fully educate you on the benefits of an alternative)
So now that there are no more gaps, you can go ahead and magic wand all those areas, and fill them one by one on a new layer. (Also delete the linework layer copy, to go back to the original quality of your lines) Aside from filling in the gaps, we sure saved a lot of time. And it looks ok, I guess. Well, not really…
Look closer. There are still all these spots that the magic wand missed. And there just isn't anything you can do about that, aside from going in with a brush and touching up all those spots. And if you're going to color with a brush at all, suddenly your pissing away all that time you thought you were saving with this shortcut technique. You might as well use one of the next two methods, which are just as time consuming, if not much less, which yield superior results.
The bottom line of all this:
There are no shortcuts. Unless your line work is consistently and remarkable simple, there is no better or faster way to do flat coloring than one of the following two methods.
Method 2 (Optimal in time and results for probably 90% of cases)
Let's start over. Some things in method 1 we're going to do again. Like setting up our layers like this:
And starting with the first color layer, the background color:
Easy enough. Now we're going to do something radical: color with a brush using your hand. Holy shit, it's the year 2000!
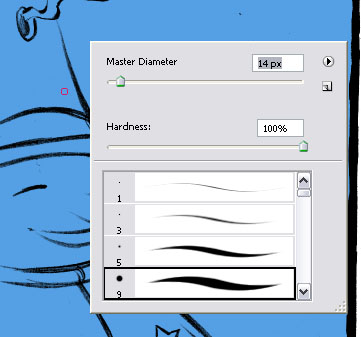
Select the brush. Then set a brush size you're comfortable with. Click the little button on your stylus (drawing tablet pen. Wacom makes them. I am presuming you have one for the sake of this tutorial. You can use a mouse too, but obviously it's harder.) You should have your stylus button set to function as a mouse right-click. This will activate the window below. If you are changing your basic brush settings any other way, you are wasting time and energy.
Now for rocket science. Draw a perimeter in color, on a new layer, while staying in the lines of your line work. It helps to zoom in while doing this. Keep your other hand over the space bar. When you press it, you can move your drawing around on the screen.

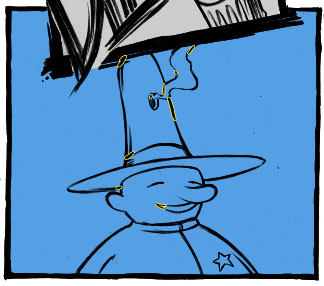
Now we aren't going to color the whole thing in by hand. That would be a criminal waste of time. Just use the flood fill tool from here.

You can see there's a little halo where the filled area meets the perimeter. This is unavoidable. But it's nowhere near as inconvenient to fix as when the fill is mingling directly with your line layer, as in method one. In fact, just about the easiest step imaginable can fix it:
Fill it again. That is, with the paint bucket, click the exact same area you just filled.

Above is an animation of what happens when you fill it again (the line layer is hidden to show the effect). The halo vanishes, but the area as a whole gets a little bigger. There's no way to avoid that. But it's not too inconvenient, most of the time.
Here it is with the line work showing:

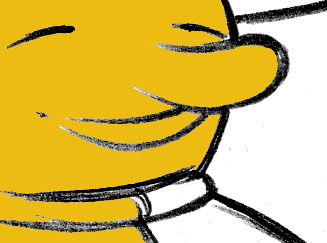
In places where your lines are thinner, or where you colored too close to the edge, the color will “bleed” over just a bit.
There are two ways to handle this problem:
1: Live with it.
If you have thick line work, you may not see it at all. Or if you're working on a big image (which is recommended anyway) and you shrink down quite a bit for final output, the effect may not be visible at all, or to a degree that doesn't bother you. Or, you may even kind of like the effect, who knows.
2: Erase it
If you hate it, you can obviously erase any excess. Shouldn't take long in most cases. Or, if it looks like it will take long, and it's intolerable to you, you can use method 3.
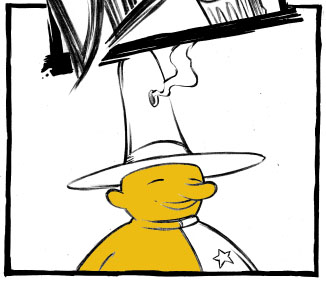
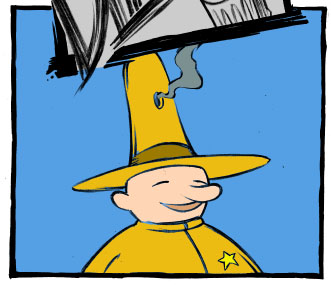
Here is the finished version using this method.

I've put each major colored area on it's own layer, and labeled them appropriately:

I highly recommend this if you want to move on to more advanced techniques from here. (If not, then stick ‘em on one layer if you want. Doesn't really matter) These will serve as highly value areas for masking, and drawing on top of without having to worry about staying in the lines again. In fact, it doesn't even matter what colors I chose here. If I don't like them in the end, I can go back and change any of them, by clicking on a layer and tweaking the color qualities (ctrl + U), or masking them (ctrl + click layer icon) and filling with another color on a layer above. From an advanced perspective, flat coloring is purely grunt-work, and the only objective is to get all the needed well-defined maskable areas on their own layers, for further tweaking later.
Some things to note: I didn't go nuts. I put small things all on one layer called misc, like the mouth, smoke, star, etc. If you find yourself with too many layers, and feel it can be consolidated a bit, ctrl + E (merge layer) is good to know. It combines the selected layer with the one underneath, into one layer. Another thing: Notice how I started with the shirt/hat layer, then did the skin. When I made the skin layer, I put it underneath. That way I have no chance of drawing on top of work I've already done that I don't want to disturb. I already got the hat brim and collar line right, why would I want to do it again? Just a time-saving trick. You may find your own as you go.
But back to the issue of “bleeding”, and how to handle it. It becomes a moot point with method 3.
Method 3: (Works well for 100% of coloring tasks, for just a little more time spent)
This is identical to method 2, up until this stage:
Instead of clicking it again with the paint bucket to erase the halo, we will get rid of it like this:


Yep, just draw over it with the brush. Very easy. Personally, I mix it up, using methods 2 and 3 almost equally.
That's just about all you need to know on flat color. Although I will touch on one more idea, for your benefit. A process I described earlier reminded me that it was a link in a chain comprising another useful task. It was a…
Stroke of Genius
Sometimes a nice graphic trick is to put a colored stroke around the line work. It can help separate the drawing from a background that's too dark or busy, emphasize the line work, or add n element of dynamism. I'm not promoting the abuse of this trick. If you do it too much, it'll get old. But it's nice to know how.
Start with the process I described early in method 1, i.e. duplicating the line layer.
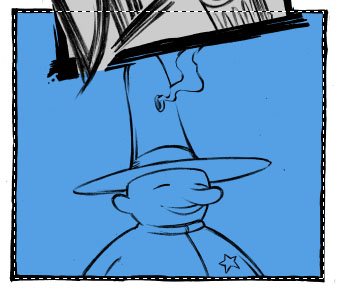
Then close all the gaps with the brush. (highlighted here. Don't actually draw yellow on the damn thing, you fool)
This seals the perimeter, so we can make a good selection using the magic wand. Make sure the linework copy layer is selected.

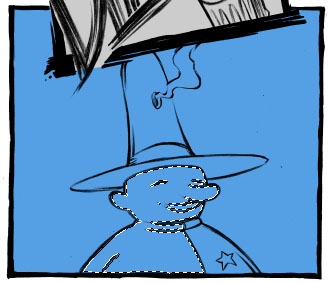
Take the magic wand and select the parts outside of the line work. Hold in shift while you make selections, so you can keep adding to the whole selection. Don't forget any bit of negative space, like that tricky little spot between the smoke and hat.
Then invert the selection. Select -> Inverse (ctrl + shift + I). Now pick a color you want the stroke to be.
Create a new layer for the stroke, just above the background color (layer p2).

There are a couple different ways to proceed from here. I'll describe both and let you choose.
Stroke method 1
- Click the Paths tab (usually grouped with the Layers window. If not, Windows -> Paths.)
- Turn the selection into a path (see image below)
- Click the brush, set the brush thickness to be the thickness you want for the stroke. You may have to do this a few times to get what you want.
- Hit Enter.

The stroke appears automatically. Notice a lot more was stroked than you probably wanted (even the little specks from the line art). You'll have to clean this up.
Stroke method 2
- Got to Select -> Modify -> Expand. Type in the width you want the stroke to be.
- Just flood fill the selection on the new layer.

This way is just a little simpler, I think. But it amplifies the noise of the line work more. You can see there are a lot more little “stroke ghosts” to clean up. And because no path had to be created with curious math algorithms, the stroke runs a little truer to the perimeter. This is the method I use more often.
To clean up, you can just erase anything you don't want. Although I do have a faster method. Just erase any part that is directly touching the stroke (as you'd like to see it). Once it's separate from all the stuff you don't want, use the wand to select the wanted stroke area. Then invert selection (ctrl + shift + I), hit delete. Gone.
Here it is cleaned up.

Because it's on its own layer, I can easily change the stroke color if I want, too.
|
